Fibre To The Home
Initial experiences with fibre-based broadband
I recently signed up for Eir’s fibre-based broadband package and took an immediate dislike to the Sagemcom router that it came with. It was fiddly to configure and I wanted to see if I could swap it out for an existing and more familiar broadband router I already had. This article outlines how I did this by flashing the old router with open source OpenWRT/LEDE software and configuring a VLAN to get it to work.
The main reasons for doing this:
- A more familiar user interface
- Easier to configure things like firewalls, proxies etc.
- An excuse to write up a description of my current broadband setup
BACKGROUND AND FIBRE ROLLOUT
I began my remote working life from Co. Kerry back in November 2003 and vividly remember the evening I got my first DSL connection up and running and was able to connect to a work desktop computer 200 miles away in my Dublin-based office and use it like I was physically sitting in front of it. The 4Mbps download speeds at that time seemed futuristic.
In the intervening years we moved to rural Co. Tipperary and continued using DSL, but due to living on the absolute edge of the 5km limit for DSL exchanges we got the absolute minimum available speeds at the time (about 0.8Mbps). Then around 2015 we ditched the DSL thanks to the availability of a strong 4G signal in the area and a relatively big jump to speeds of around 40Mbps.
In the meantime, next generation fibre optic broadband had started to make inroads with faster and longer range links. But countryside fibre seemed a distant dream until in mid 2019, Eir, Ireland’s largest telecoms provider, announced a €250m fibre investment to upgrade their national broadband infrastructure. The rollout began by focusing initially on bringing fibre-to-the-home (FTTH) with speeds up to 1Gps speeds to the outskirts of towns first, where traditional DSL speeds fall off and the benefits would be felt the most. Once the rural upgrade was completed, they would then move on to upgrading the towns and cities with newer FTTH equipment that supported even faster 10Gbps speeds.
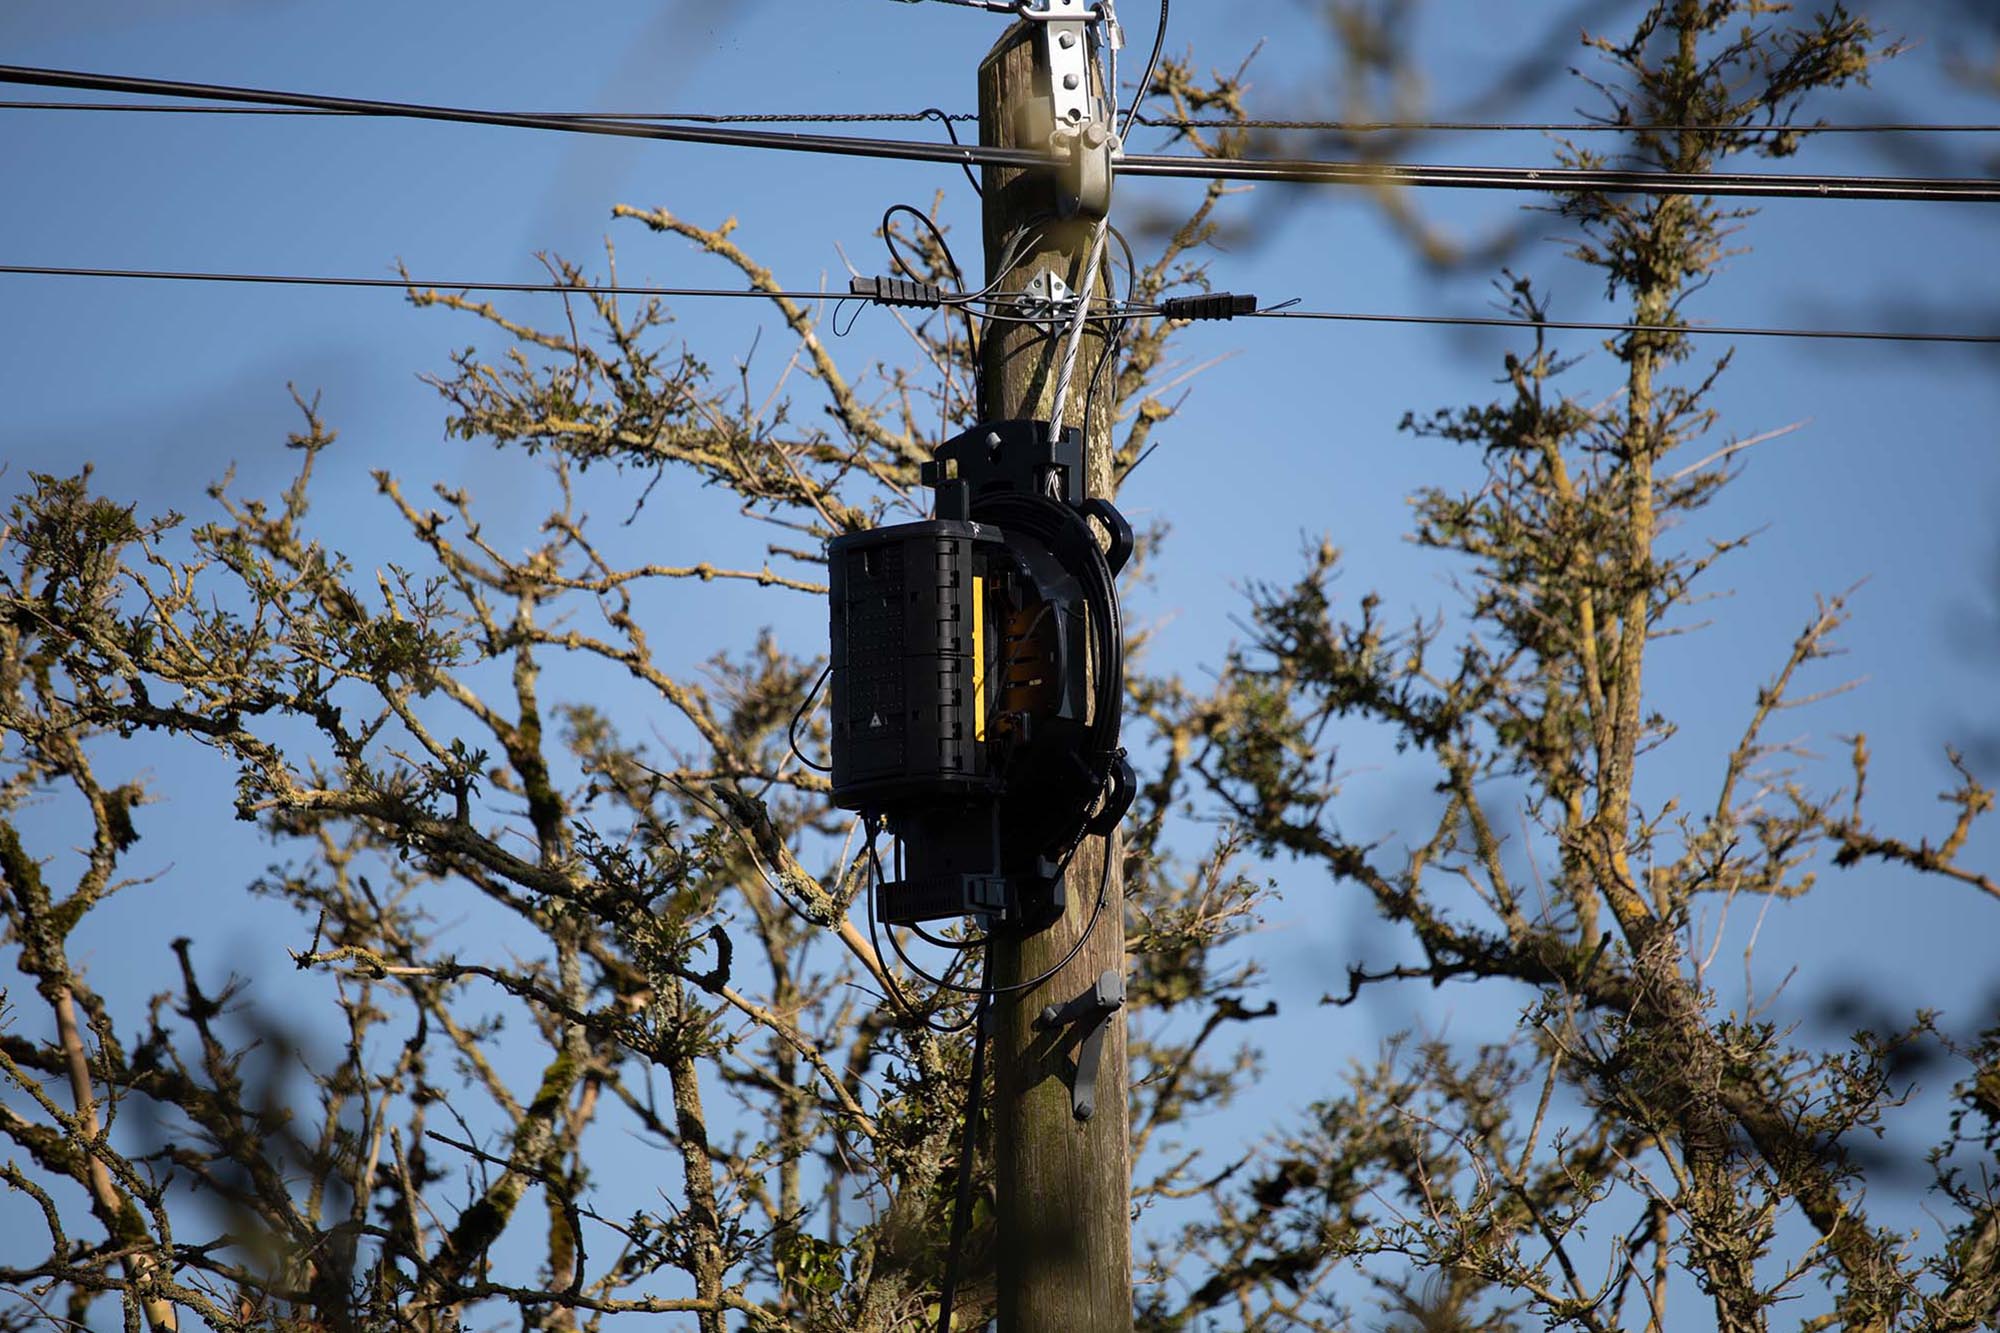
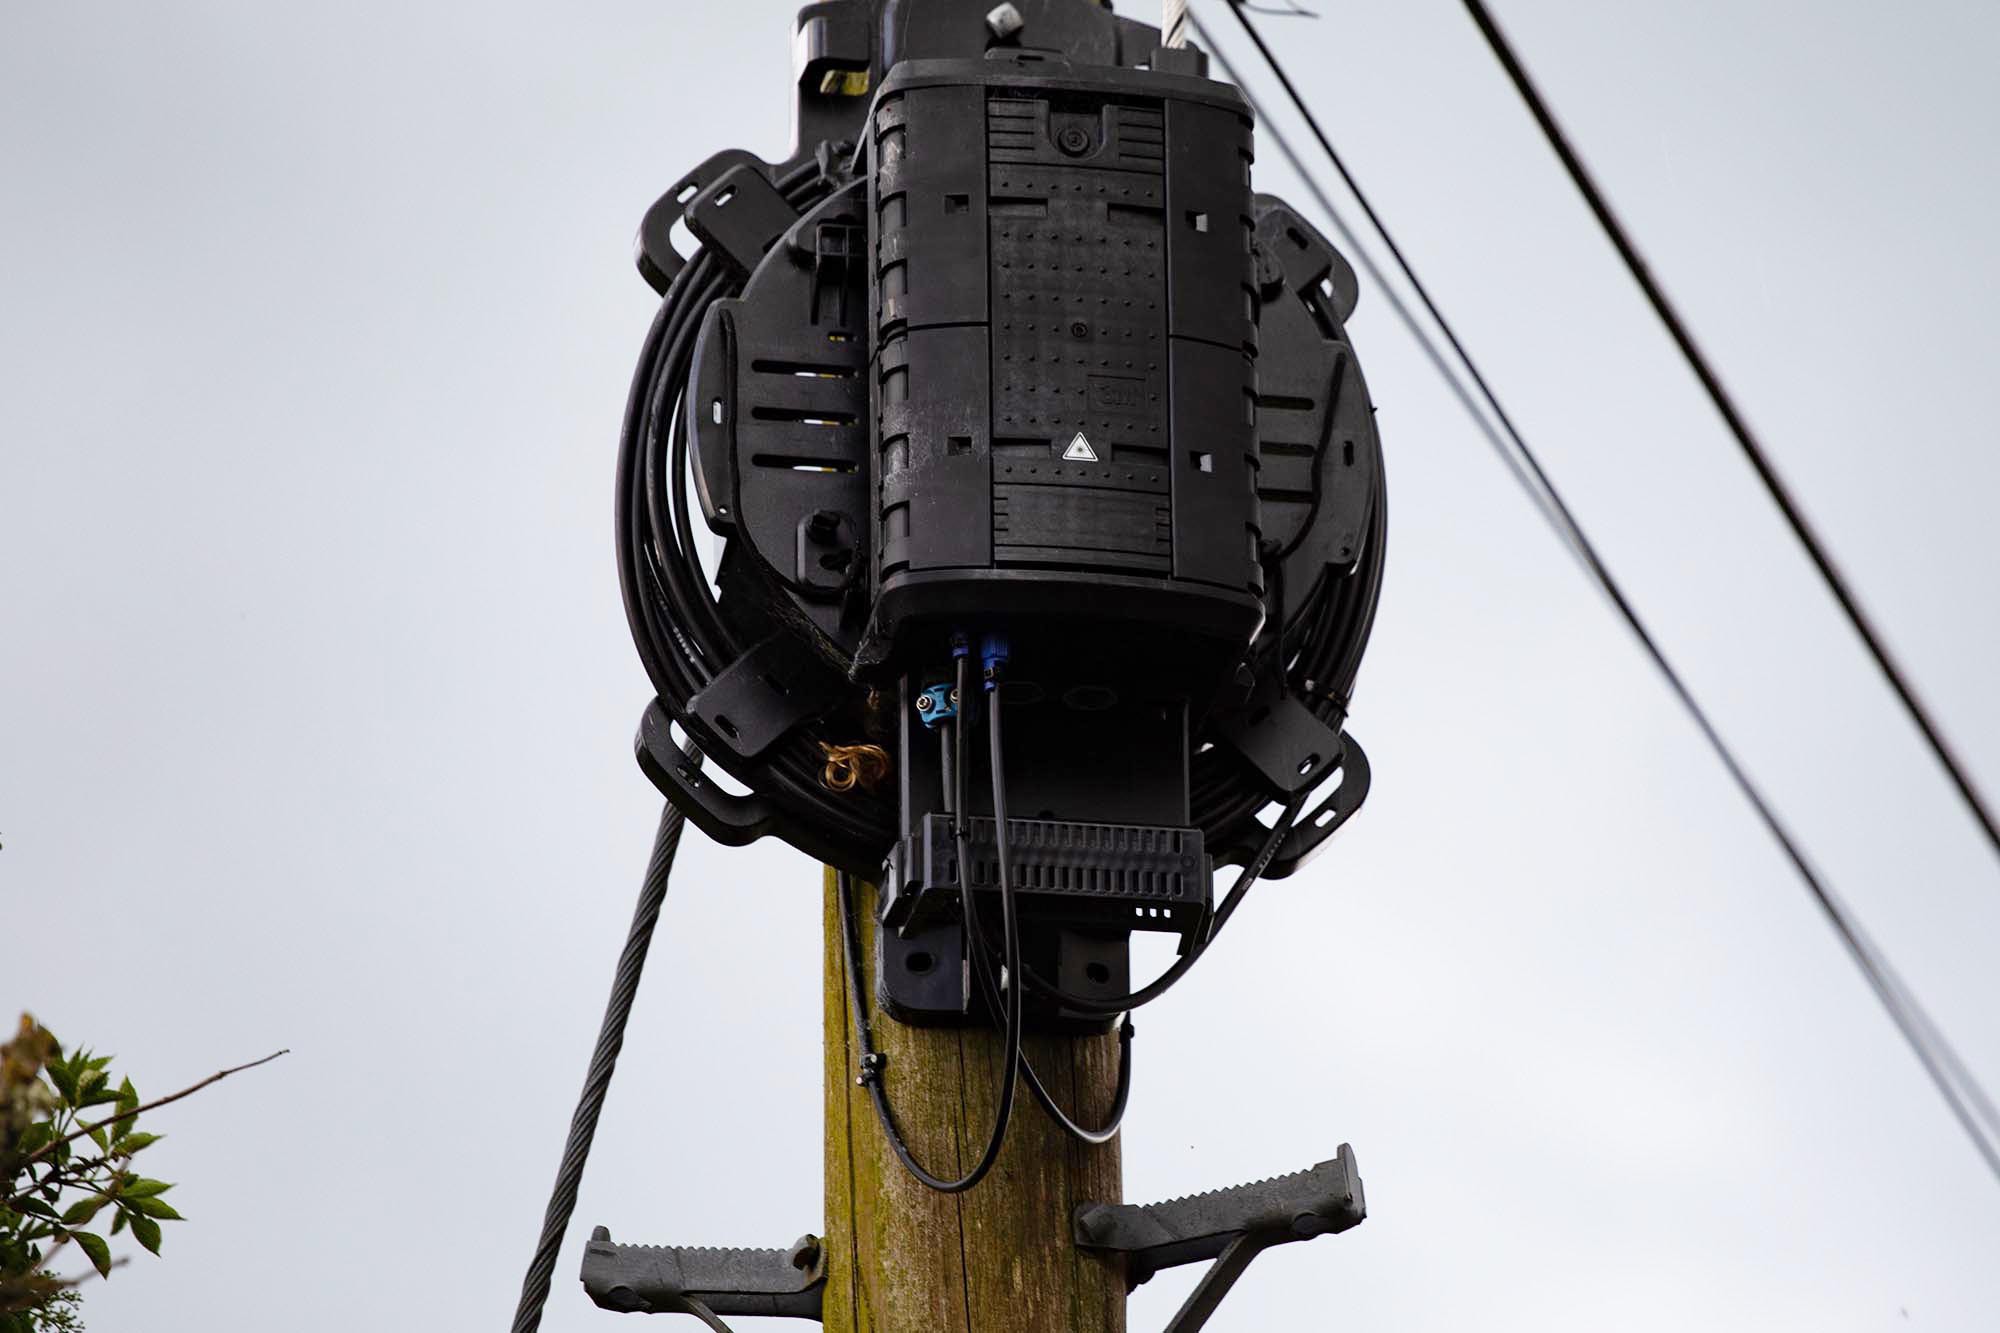
We got lucky and made it as one of the 330,000 rural installations to benefit from Eir’s upgrade. Overnight a fibre optic cable and distribution box appeared on a pole opposite our house - the last on our stretch of road - giving us the very real possibility of up to 1 gigabit speeds.
WHAT EXACTLY DO WE MEAN BY FIBRE?
At this point it’s worth clarifying a few things when it comes to broadband speeds that have been muddled due to overmarketing and general ambiguity. When Eir originally rolled out Fibre-to-the-Cabinet (FTTC) in 2010 they marketed it as “fibre broadband” even though it was still DSL that was bringing the internet into each home. So while the core “back bone” connection to the local cabinet had speeds of 1GB, the connection between the cabinet and the home was still just copper-based DSL and this could never be more than 100Mbps. Cable broadband helped somewhat with higher speeds of up to 500Mbps but unlike copper phone lines, not all parts of a town had cable.
It’s also worth mentioning the National Broadband Plan (NBP) which was set up in 2019 to extend high-speed broadband to premises in hard-to-reach areas not served by Eir’s fibre upgrade. This promised speeds of 150Mbps by year one and 500Mbps by 2030 (EDIT the first official installation occured in January 2021).
EIR PACKAGE AND SETUP
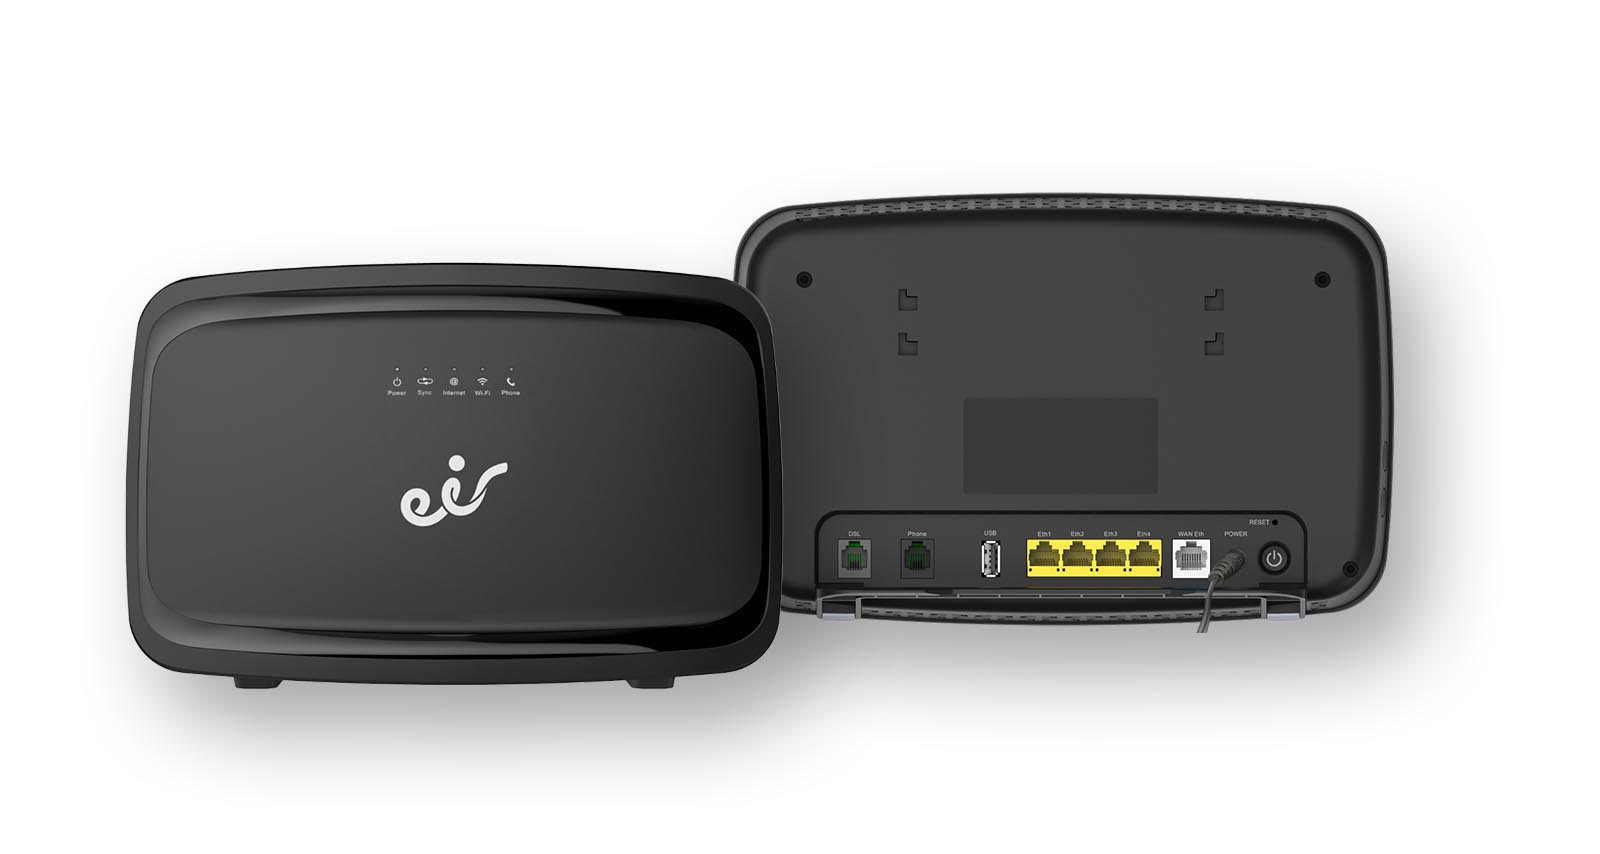
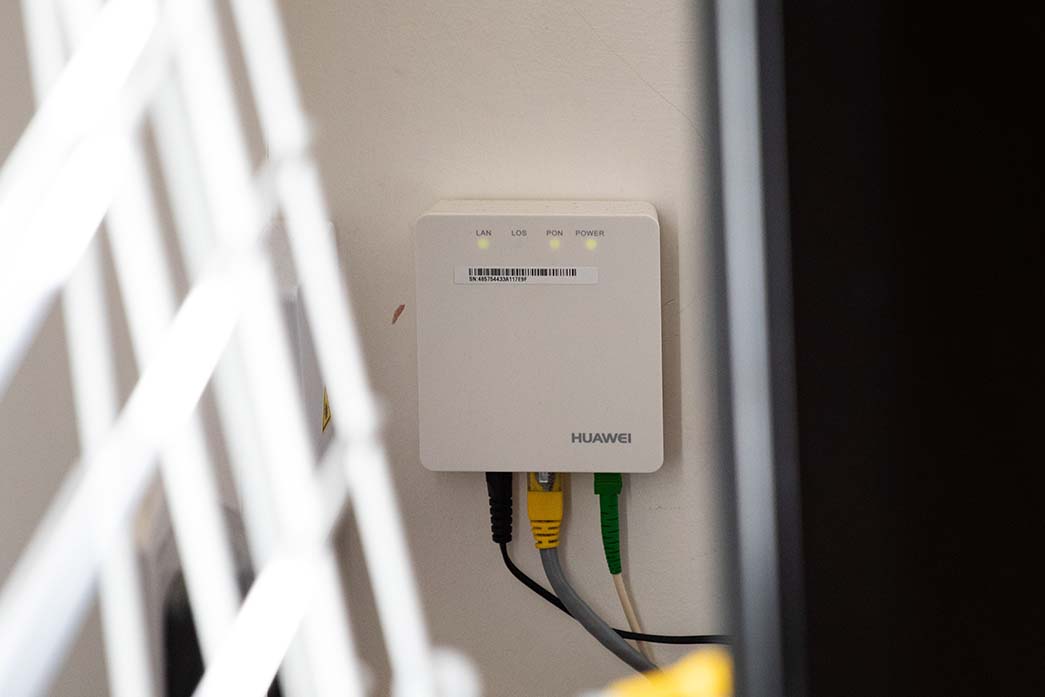
The Eir package I opted for cost €45.99 per month (24 months) and I also paid a €49.99 installation fee which involved an engineer bringing a wire across the road, onto my gable end and in through the wall. The router was free and is a Sagemcom Eir fibre box 1A 1.0 CS 50001 which Eir brand as the F3000 or F5366s but only on the manual it seems ( earlier FTTH customers seemed to get an F2000 which was a rebranded Huawei HG659b).
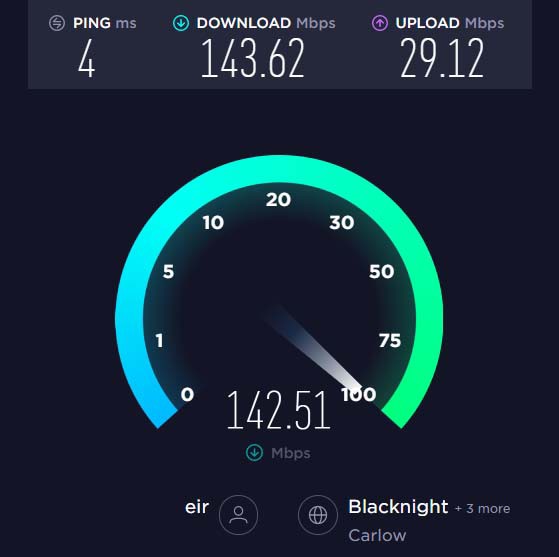
This package give us speeds of up to 150Mbps down and 30Mbps up, tripling our previous 4G download speeds and quadrupling the upload speed. Distance is not a factor when it comes to fibre, and while the maximum capacity is theoretically 1GB, the package speeds are fixed at speeds of 150Mbps down and 30Mbps up. In future we can upgrade the package to speeds of 300Mbps/50Mbps and 1000Mbps/100Mbps.
The signal comes from the splice closure on the pole outside our house that’s connected to an Optical Network Terminal (ONT) located on an internal wall.
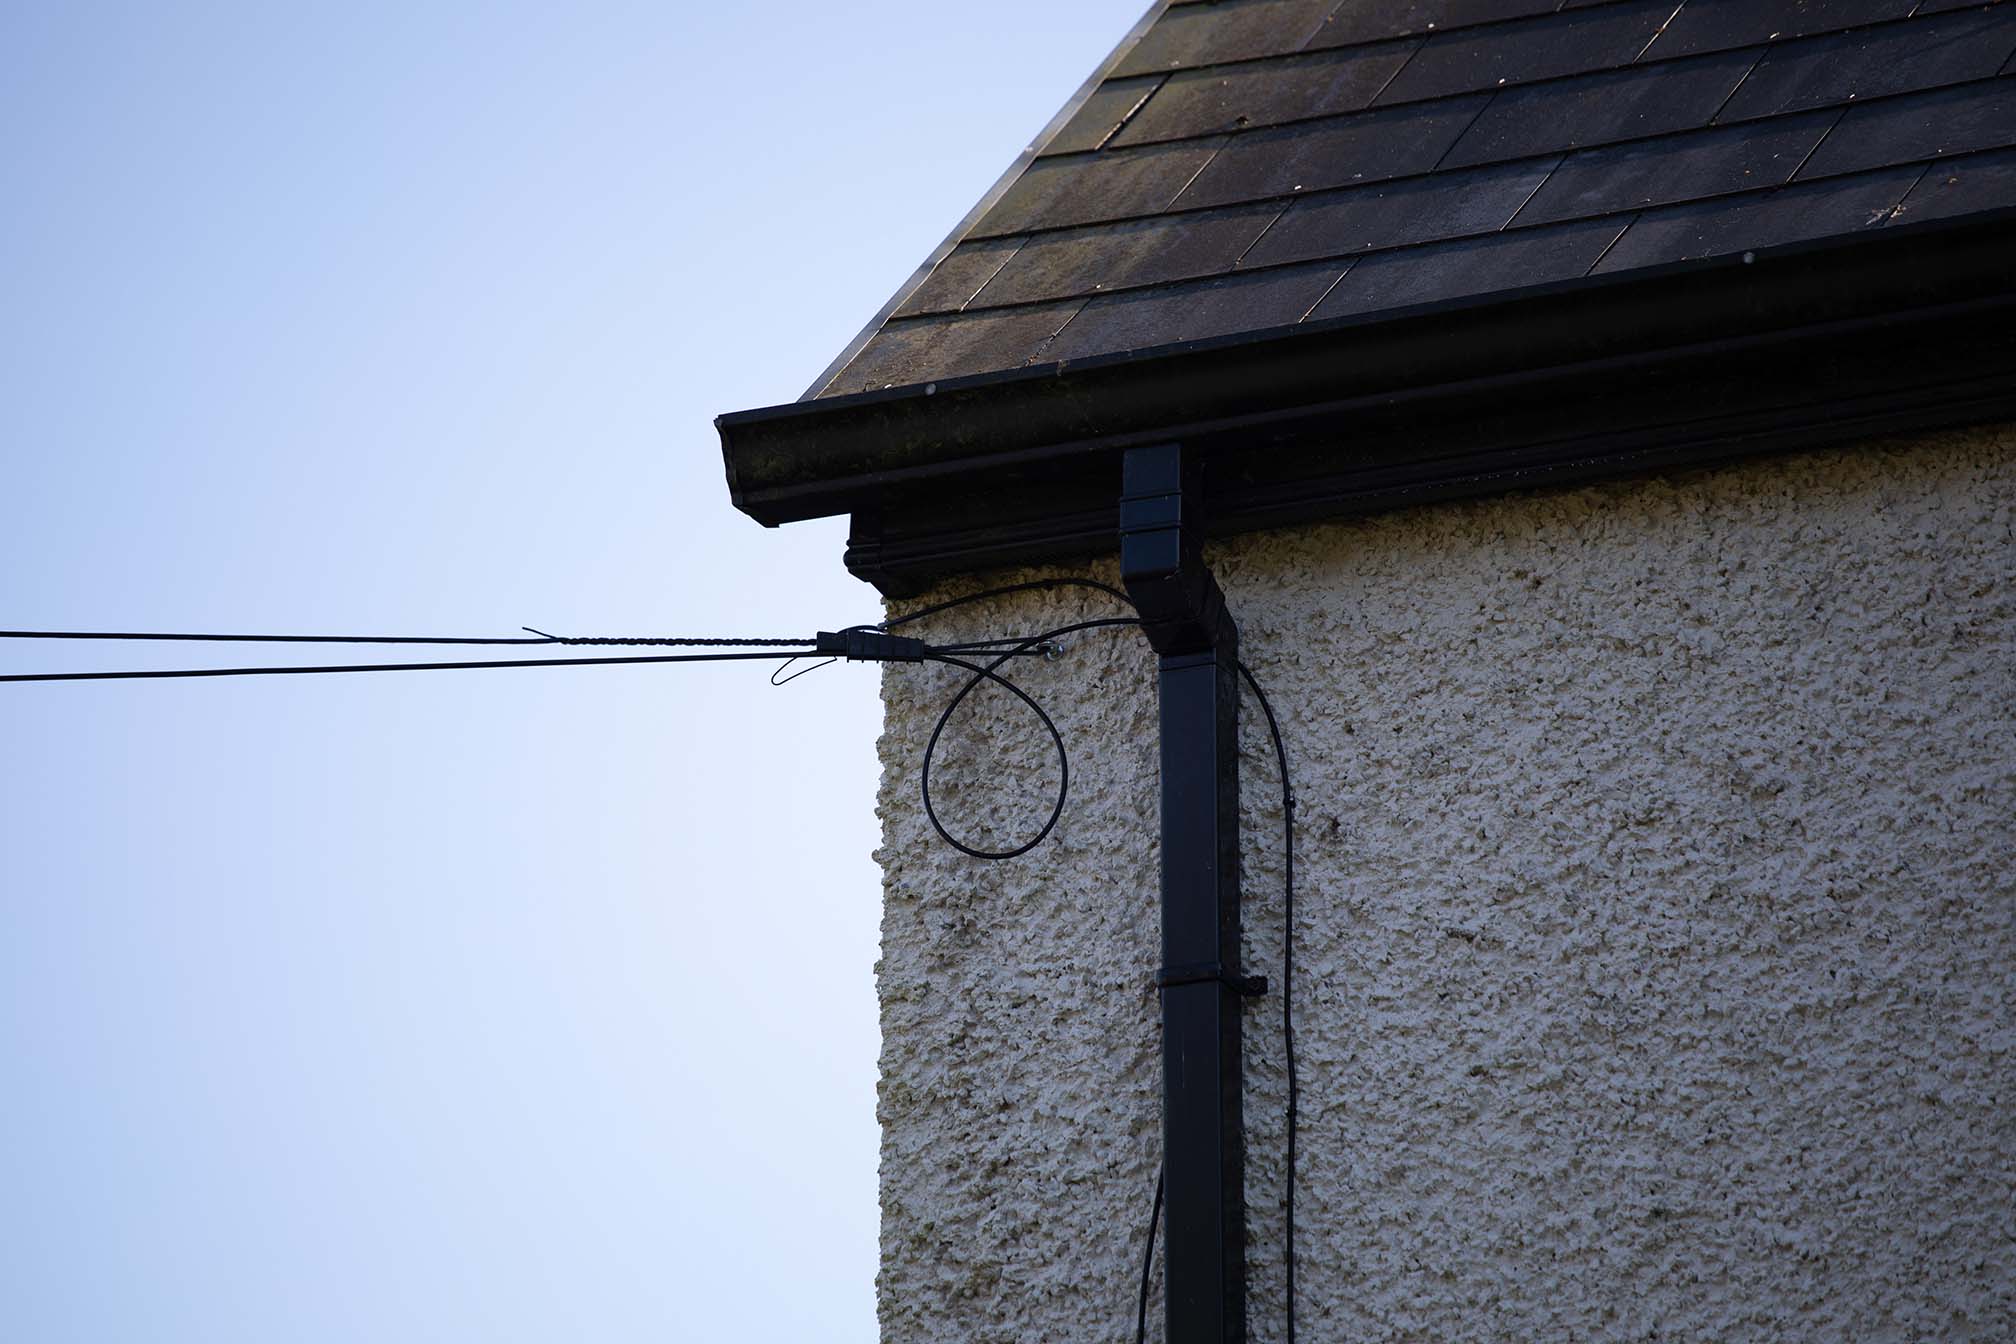
The ONT translates the light signals from the fibre optic line into electronic signals and passes them to the WAN port on the router via a standard ethernet cable.
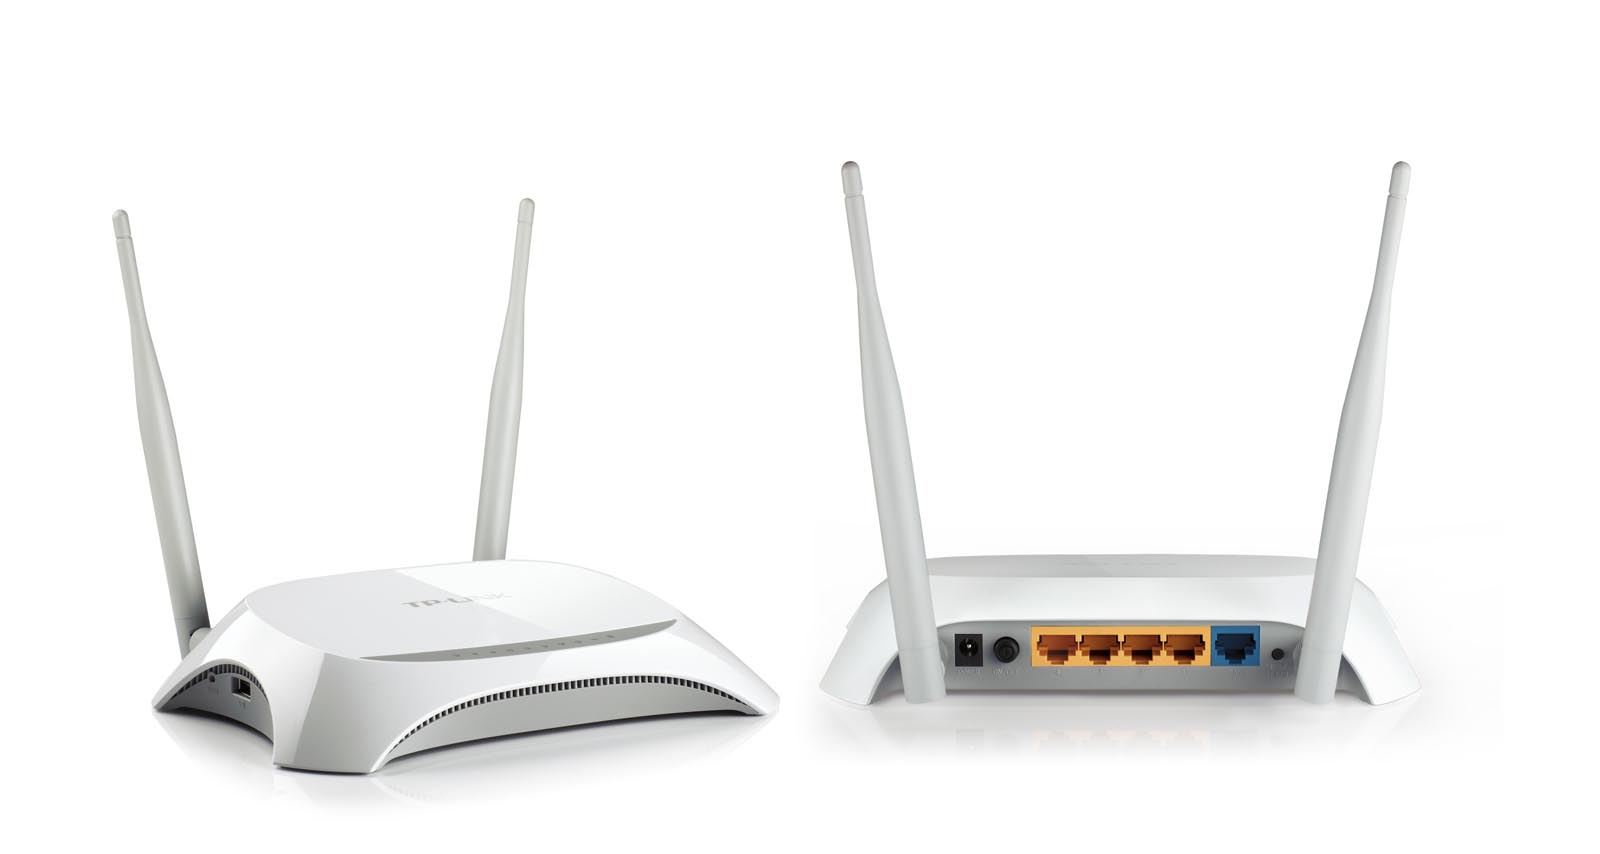
However, the Sagemcom Eir fibre Box 1A 1.0 router supplied by Eir has a poor user interface and I wanted to try using an existing modem I had that I’d be more familiar with and would have a better interface.
So I reached for a TP-Link TL-MR3420 v2 router but it didn’t support VLAN tags which is necessary in order to work. A little bit of research informed me that installing OpenWRT on the MR3420 would provide VLAN support.
INSTALLING OPENWRT ON A GENREIC ROUTER & CONFIGURING THE VLAN
Configuring a router to work with Eir’s fibre broadband connection requires etting its WAN port to recieve and transmit on a VLAN. Not all default firmwares allow this, but all the major opensource ones do, such as OpenWRT. I was able to install OpenWRT on the TP-Link TL-MR3420 v2 router after finding the OpenWRT site had firmware for this model.
Here are the basic steps:
Download the firmware file and flash it onto a TP Link router via its existing interface.
Plug the ethernet cable into the router’s LAN port (not WAN) and connect another port to a laptop.
Navigate to the OpenWRT interface using 192.168.1.1
Set the password and enable wifi at this point in order to be able to connect to the router from your laptop using SSH over wifi.
Go to
Network > Switchand add a new VLAN and call it10To fully get the configuration working you’ll need to edit the
/etc/config/networkfile as making the change the UI only seems to update the vid option, not the vlan option. So manually change the vlan option to10so it matches the vid.
config switch_vlan
        option device 'switch0'
        option vlan '1'
        option vid '1'

config switch_vlan
        option device 'switch0'
        option vlan '10'
        option vid '10'
        option ports '0t 2t'
- If you need to change the router’s IP address then edit
ipaddr:
config interface 'lan'
        option ifname 'eth1'
        option force_link '1'
        option type 'bridge'
        option proto 'static'
        option ipaddr '192.168.1.254'
        option netmask '255.255.255.0'
        option ip6assign '60'
- Restart the router.
CONCLUSION
While it’s useful to have an alternative router in the MR4320, its older “fast ethernet” 10/100 ports mean the maximum speeds that will come out of it will be under 100Mbps. This means that if I want the maximum speeds of 150Mbps my current fibre package has to offer, I’ll have to just stick to using the Sagemcom router with its Gigabit ports and ponder the pointlessness of this whole exercise.
Another option is buy a more modern router with Gigabit ports and either configure it with a VLAN as described above or setup the Sagemcom router in bridge mode and connect a better router downwind of it.
USEFUL LINKS
Dermot O'Halloran
Extrapolating from experience to form generalizations